Sunday, December 25, 2016
Friday, December 23, 2016
Amazing 2016 Christmas Video
Love incarnate, love divine
Star and angels gave the sign
Bow to babe on bended knee
The Savior of humanity
Unto us a Child is born
He shall reign forevermore
Noel, Noel
Come and see what God has done
Noel, Noel
The story of amazing love!
The light of the world, given for us
Noel
Son of God and Son of man
There before the world began
Born to suffer, born to save
Born to raise us from the grave
Christ the everlasting Lord
He shall reign forevermore
Noel, Noel
Come and see what God has done
Noel, Noel
The story of amazing love!
The light of the world, given for us
Noel
[repeat twice]
Noel lyrics © Capitol Christian Music Group
Thursday, December 22, 2016
Oh, Come, All Ye Faithful - The Reason for the Season
Sunday, November 27, 2016
Thursday, October 6, 2016
Hershey's Perfectly Chocolate Chocolate Cake & Frosting Recipe

CAKE:
2 cups sugar
1-3/4 cups all-purpose flour
3/4 cup HERSHEY'S Cocoa
1-1/2 teaspoons baking powder
1-1/2 teaspoons baking soda
1 teaspoon salt
2 eggs
1 cup milk
1/2 cup vegetable oil
2 teaspoons vanilla extract
1 cup boiling water
3/4 cup HERSHEY'S Cocoa
1-1/2 teaspoons baking powder
1-1/2 teaspoons baking soda
1 teaspoon salt
2 eggs
1 cup milk
1/2 cup vegetable oil
2 teaspoons vanilla extract
1 cup boiling water
"PERFECTLY CHOCOLATE" CHOCOLATE FROSTING:
1/2 cup (1 stick) butter or margarine
2/3 cup HERSHEY'S Cocoa
3 cups Powdered sugar
1/3 cup milk
1 teaspoon vanilla
CAKE DIRECTIONS:
1. Heat oven to 350°F. Grease and flour two 9-inch round baking pans.
2. Stir together sugar, flour, cocoa, baking powder, baking soda and salt in large bowl. Add eggs, milk, oil and vanilla; beat on medium speed of mixer 2 minutes. Stir in boiling water (batter will be thin). Pour batter into prepared pans.
3. Bake 30 to 35 minutes or until wooden pick inserted in center comes out clean. Cool 10 minutes; remove from pans to wire racks. Cool completely. Frost with PERFECTLY CHOCOLATE CHOCOLATE FROSTING. Makes 12 servings.
FROSTING DIRECTIONS:
- Melt butter. Stir in cocoa. Alternately add powdered sugar and milk, beating to spreading consistency. Add small amount of additional milk, if needed. Stir in vanilla. About 2 cups frosting.
- VARIATIONS:
- ONE-PAN CAKE: Grease and flour 13x9x2-inch baking pan. Heat oven to 350° F. Pour batter into prepared pan. Bake 35 to 40 minutes. Cool completely. Frost.
- THREE LAYER CAKE: Grease and flour three 8-inch round baking pans. Heat oven to 350°F. Pour batter into prepared pans. Bake 30 to 35 minutes. Cool 10 minutes; remove from pans to wire racks. Cool completely. Frost.
- BUNDT CAKE: Grease and flour 12-cup fluted tube pan. Heat oven to 350°F. Pour batter into prepared pan. Bake 50 to 55 minutes. Cool 15 minutes; remove from pan to wire rack. Cool completely. Frost.
- CUPCAKES: Line muffin cups (2-1/2 inches in diameter) with paper bake cups. Heat oven to 350°F. Fill cups 2/3 full with batter. Bake 22 to 25 minutes. Cool completely. Frost. About 30 cupcakes.
Wednesday, August 31, 2016
Lemon Garlic Shrimp & Linguine

1 Tablespoons olive oil
2 Tablespoons butter
2 cloves garlic, minced
1/2 pound large raw shrimp, shelled & deveined
salt and pepper to taste
1/2 teaspoon italian seasoning
1 cup broccoli crown, broken apart
1/4 cup parmesan cheese
1 Tablespoons parsley, chopped
1 1/2 teaspoon lemon juice
- In a large pot cook the linguine in salted, boiling water about 9 minutes. Drain and set aside.
- Heat olive oil and 1 Tablespoon of butter. Then add the garlic and cook until fragrant.
- Add the shrimp and salt and pepper to taste. Cook until the shrimp starts to turn pink. Add italian seasoning and broccoli and cook until slighly soft.
- Add the pasta to the pan with the remaining butter, parmesan, and parsley. Stir until mixed and butter is melted.
- Add the lemon juice and serve while hot.
2 Servings
***The original recipe for this dish was from therecipecritic.com and I changed a few things to suit my preference. Easy - Yummy and Filling, I will make this again.
Friday, August 19, 2016
Chocolate Mint Ice Cream

Ingredients (4-6 servings)
2 cups half and half or whole milk
4 lg egg yolks
1/2 cup sugar
1 cup heavy whipping cream
2 tsp. Peppermint extract
3 1.4oz Peppermint Patties [frozen for about 10 minutes prior to chopping]
OR...you can use 3 ounces of Andes Candies chopped (2/3 cup)...
I really prefer the Peppermint Patties to the Andes Mints in this creamy Ice Cream
Instructions
+NOTE: 1 day ahead, place ice cream maker bowl into freezer+
Prepare a bowl of ice water, set aside. In the top of a double boiler, or a bowl placed over a pan of simmering water, heat the half and half until just steaming In a separate bowl, whisk the egg yolks, then add the sugar and mix. Add 1/2 of the half and half to the egg yolk, sugar mixture, mix. Add to the steaming half and half. Stir and cook over simmering water for about 10 minutes or until the mixture thickens and coats the back of a spoon. Immediately place bowl into ice bath, stir occasionally until mixture is at room temperature.
Transfer to a Tupperware container, add cream and extract, refrigerate about 3 hours. place mixture into ice cream maker bowl, turn on machine and let the magic begin!
Tuesday, August 16, 2016
PuppyKid Birthday Party Today

All of the Pups were groomed Saturday and Sunday - by me...and I thought it was time for some updated pictures of all of them. So, I put this little collage together for you to be able to see them all.

Jasper 8yr old Male Maltese
Angel 3yr old 14# Female Havaton [Havanese, Coton de Tulear Mix]
Rosie 6yr old 12# Female Shih-Poo [Shih Tzu, Toy Poodle Mix]
The Pups are celebrating today...with their favorite treats [for their teeth], bananas and chicken. We'll all have a great time.
Thanks for stopping by....
Wednesday, August 10, 2016
Frozen Irish Cream Mousse Cake

This Frozen Irish Cream Mousse Cake is completely no bake, incredibly smooth and so creamy! The flavor of the Irish Cream is spot on and with a touch of chocolate, I am in love!
Lindsay, from Life, Love and Sugar posted the recipe for this and when I saw Irish Cream and Chocolate, she had me. I'll be making this real soon! Every other Saturday, I make a dessert to share with 2 of my neighbors. We get together and ENJOY!!
Read more and Get the Recipe for this Dessert at: http://www.lifeloveandsugar.com
Friday, August 5, 2016
Tour My Office - Pink

I have taken off the cabinet doors, to make room for displays [the cabinets on the bottom of the 2 bookshelves have their doors removed, too...for the Pup's Toy Storage]. I'd rather have that than a bunch of hidden junk!

I have 9' sloped ceilings, with beautiful mouldings.
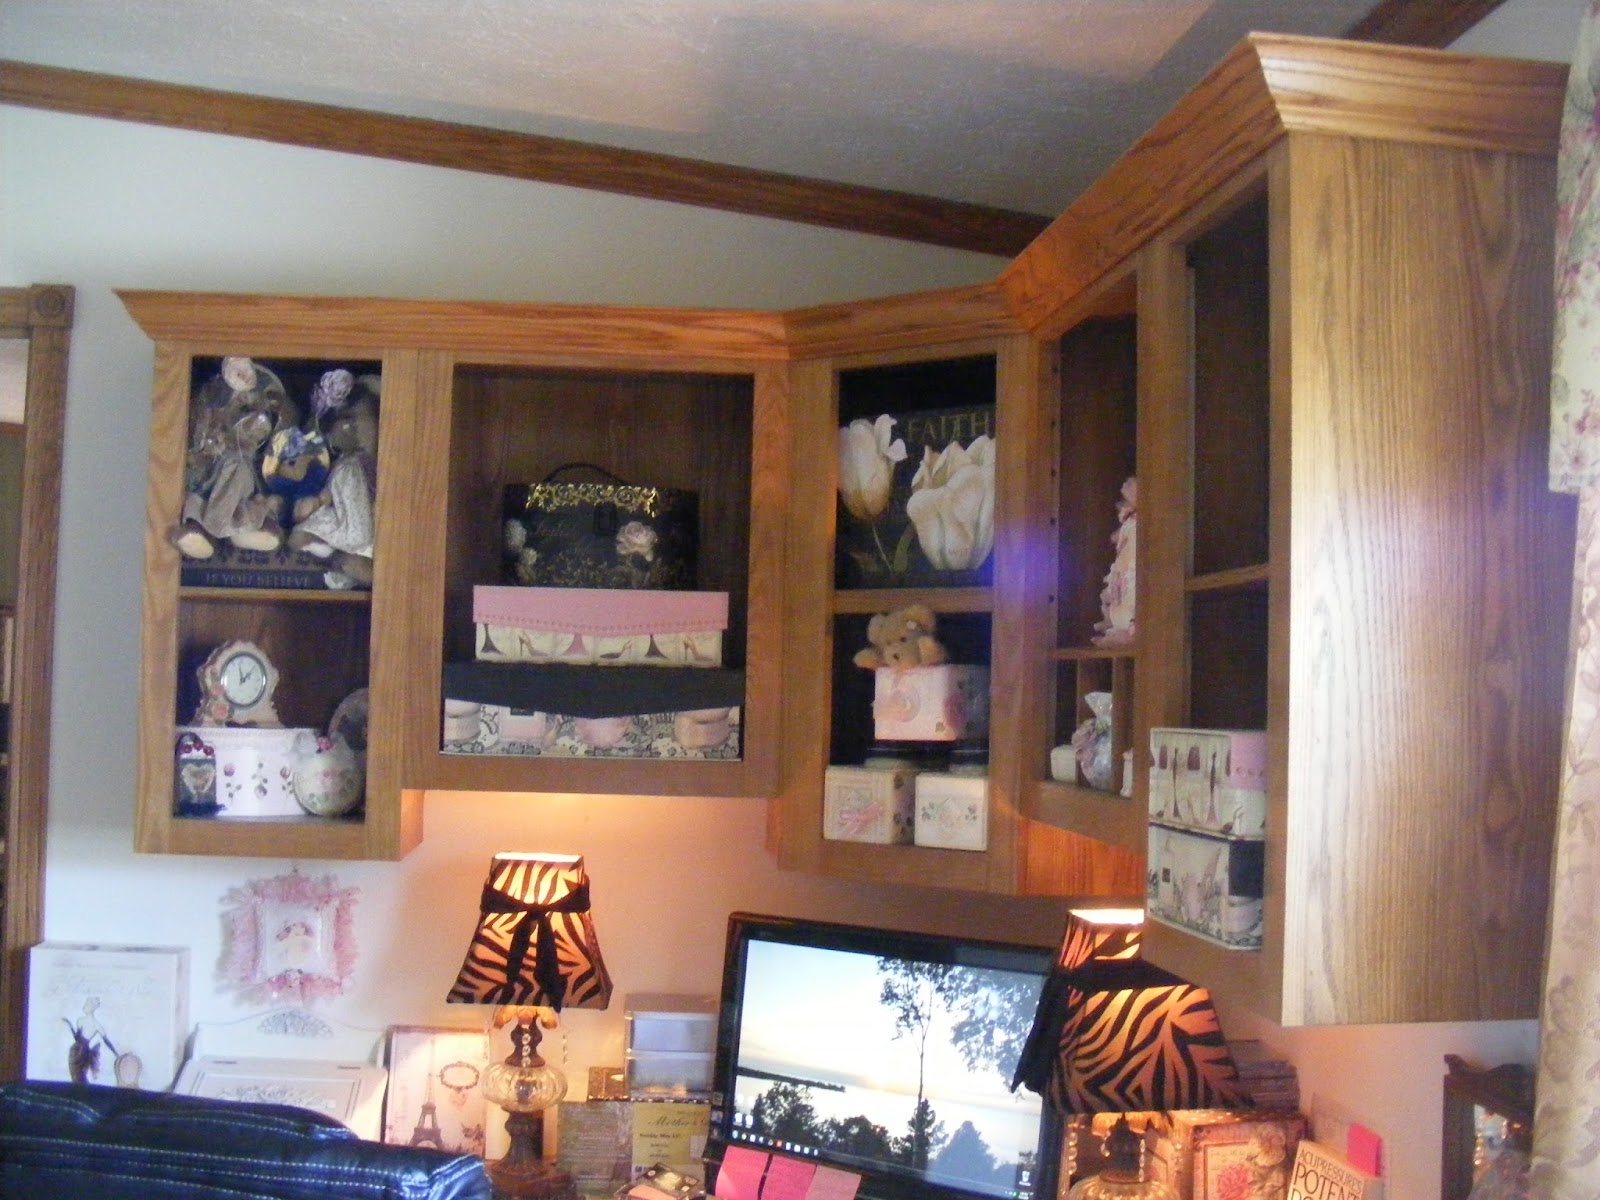
The corner with my Black Armoire display...with a view of my Great Room. [the doggie gate has been down for months...since my Pups stay with me quite nicely in the office without it]


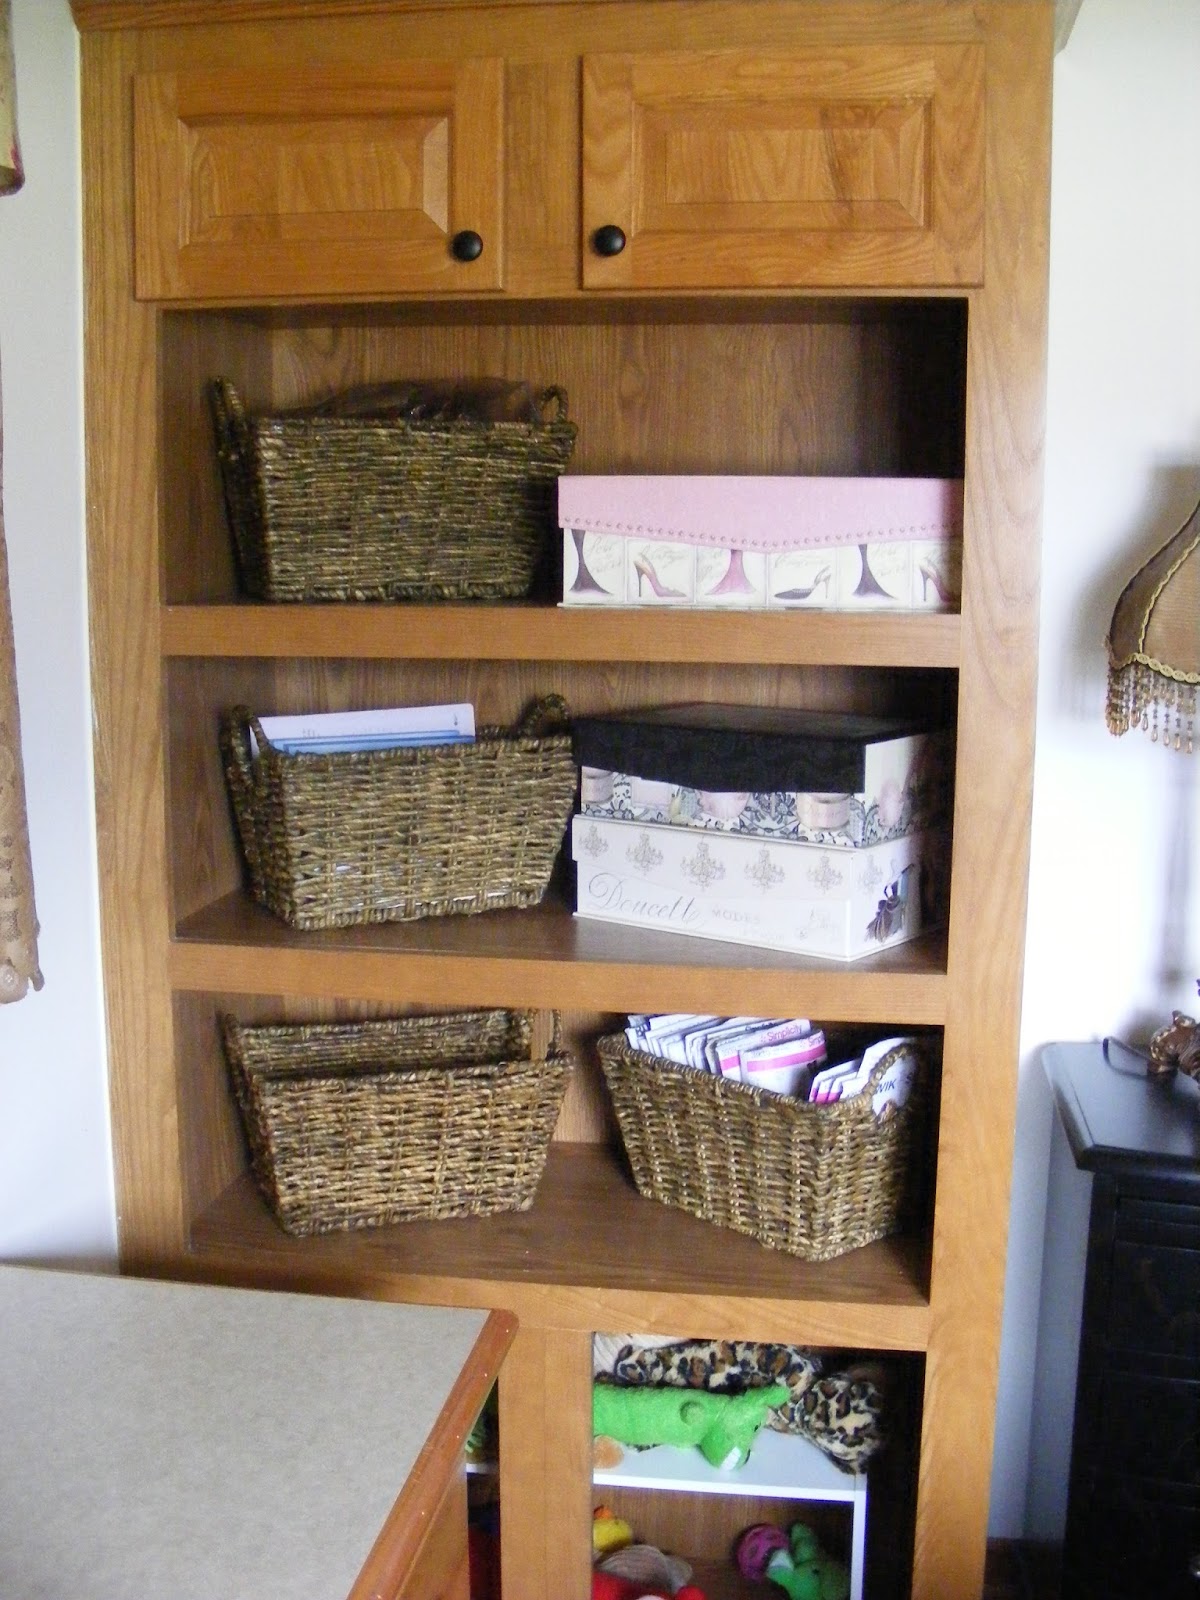
This Bookcase is on the other side of the closet door and flanks the window in the back of the office.

What is a bed doing in my office? Well, it's a Massage Table. That's where I get my BioMat treatments. You can read about the BioMat in my post Here.
To the right and left of the desk are matching bookcases. And here you see both of my windows.

One last view of my desk!

Thanks for stopping by and taking a look around my office. Hopefully, when you see it next, it will look a bit different. And, I hope it's painted.
I'm joining the Link Party Thoughts of Home on Thursday at:
Laura at Décor To Adore
Stacey from Poofing the Pillows
Jemma from At Home With Jemma
Laura at White Spray Paint
Wednesday, July 27, 2016
Master Bedroom & Bathroom Make-Over
***Originally posted in February 2016*** [a few changes made since then, but those photos will be seen at a later date] As promised, I was able to get the pictures taken and get this post done this week! WOW! Things certainly do look different around my home. And this is just the beginning. If you missed the post of How the Master Bedroom and Master Bathroom looked before, click Here. I'd always wanted a Sleigh Bed, so when I decided it was time for new Bedroom Furniture, this is exactly what I got! A sleigh bed, a high dresser...and 2 large nightstands. In a deep cherry finish. I love it. The curtains, valances, lace sheers and pleated shades are on all 12 windows in my home. Since I have a dramatically open concept home...it works so well. They are a bronzey-gold and I love them.
[the sunlight streaming in the windows...makes some of these photos a bit dark - but it adds to the drama of the room]

You'll notice that my large nightstands are not on the sides of the bed, in front of the windows as many people would place them. Rather, I opted for a smaller lamp table [black], with a shelf and drawer [big enough for the remote for the adjustable mattress base I have and the remote for the ceiling fan] next to the bed, alongside an animal print [leopard, of course] chair. After much hunting for the perfect bedcoverings, I opted for a beautiful quilt and shams, with roses and other flowers in a pink/ivory/burgundy color combination. In the photo below, you can see that the quilt is scalloped along the edges all the way around. So are the pillow shams.
The colors used in the room were all pulled from the artwork I already owned and had displayed in other areas of my home. Roses above the bed...and Woman with Roses above the night stand.

I had this print framed and got it a couple of Christmases ago, as my Christmas gift!

In this photo, you can really see the style of the furniture and the color of the wood. The sleigh bed is something I'd always wanted and when I decided to get new furniture, I bought this set. A small, ornate Syrocco mirror, lamp, Love picture, chest with fleur de lis, a heart shaped picture frame with a lady smelling a rose and a mirror tray on a pedastal, holding candle cups is all I needed to complete the look. Then I added the mate to the other Leopard print chair to the side of the dresser.

More syrocco plaques hang on the wall to the left, when you enter the bedroom. On the nightstand is Picture frame with Marie Antoinette's photo, my clock radio and a small jewelry tray that was handpainted by a good friend of mine [Celeste].

Here's another look at the dresser, with the rose picture above the bed reflected in the syrocco mirror.

I have always loved quilts and now I have this one [well, I really have 3 of this quilt, in twin, queen and king - remember my open concept? I use them in 2 other rooms.]

The pillows I've picked up throughout the last 7 years...and had put away, waiting to be used. The large one has a chenille border around vintage material in the center...the woman with the rose is in the center of an oblong pillow...again with vintage fabric...and the pillow on the left is a heart, which you can see better in the photo below.

The wide lace edging all around the pillow, with the flowers and leaves and the wide white lace...is just beautiful.
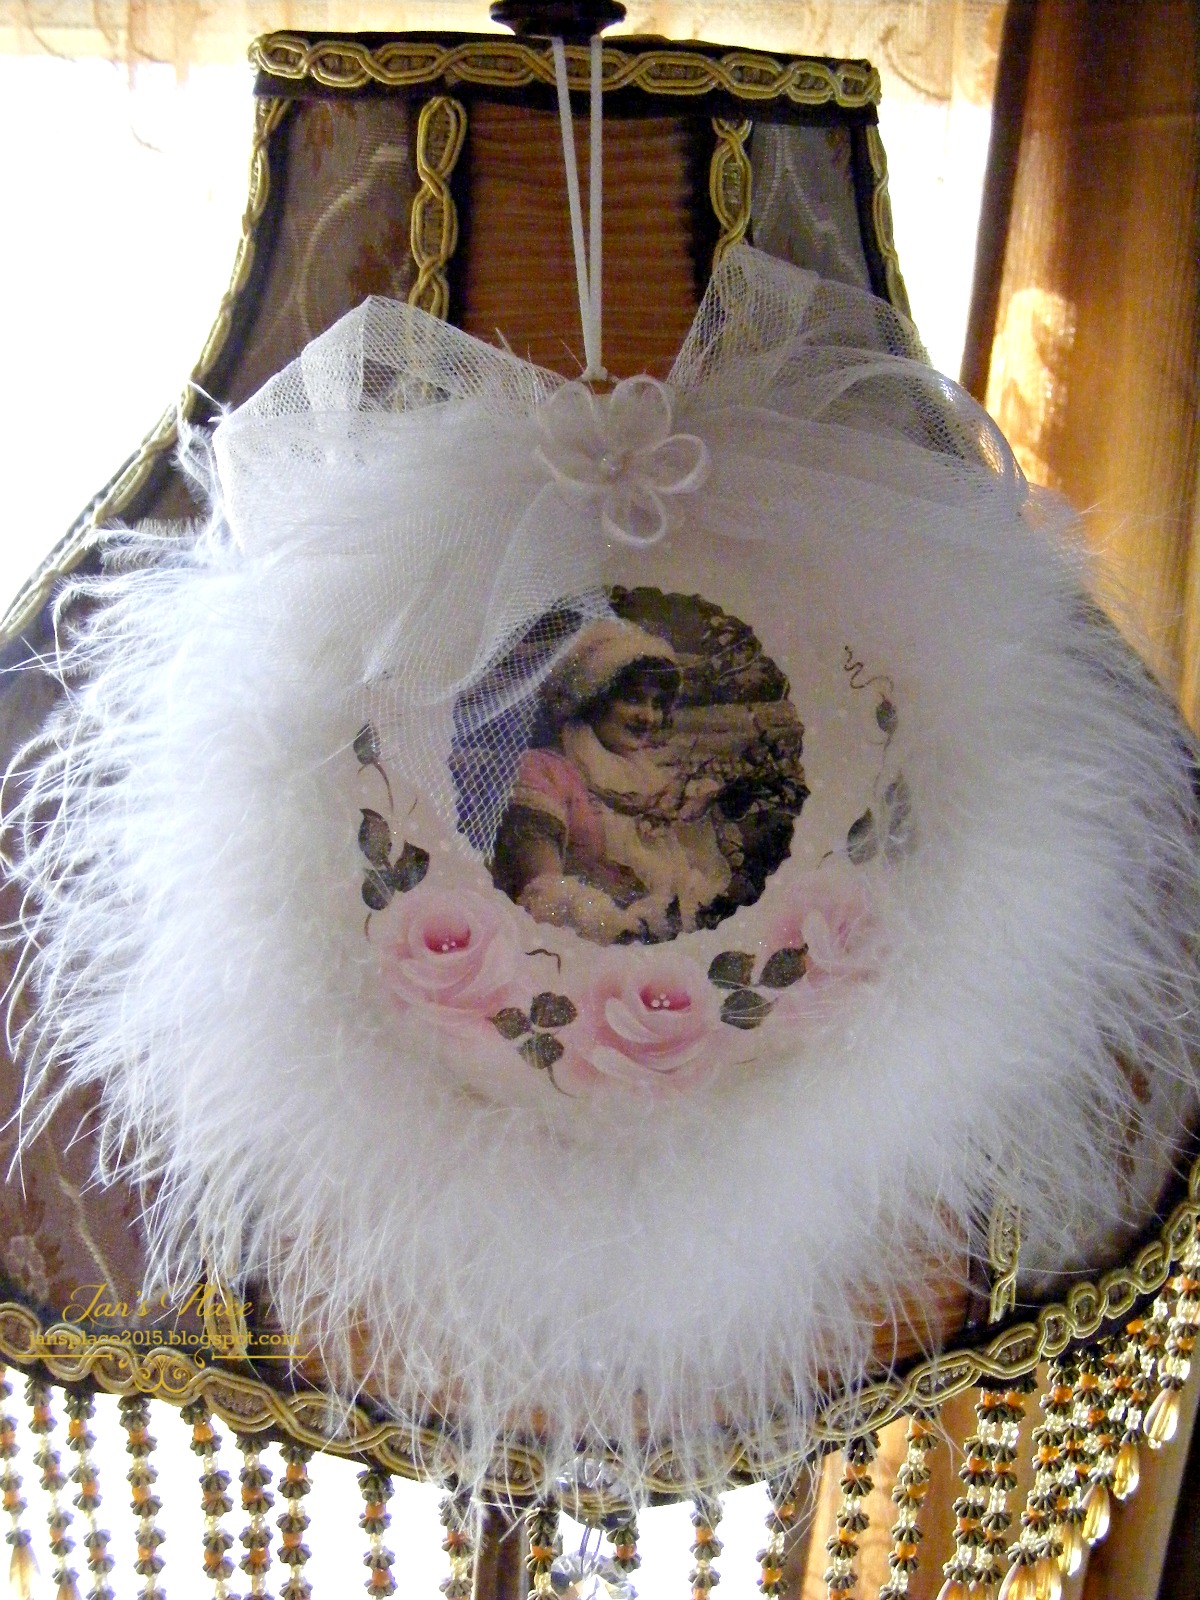
Now, over the top of my lamp, I have a handpainted ornament with roses and a lady...and lots of white boa feathers hanging. It was also painted by Celeste.
My master bathroom looks so different than before, too. I love the bronze lights, with 60-watt PINK lightbulbs in them...the bronze framed mirrors, a crackle glass bronze candle holder [in front of an all-too-bright night light - which doesn't look too bright through it]...and another handpainted tray by Celeste hung on the wall.
You can see a glimpse of the chandelier in the mirror on the left, if you really look...

Again, the sunlight makes this photo darker than it really should be...but it does look dramatic, doesn't it? This chandelier is hung on a chain from the ceiling and is hard-wired. It's bronze in color with some golden antiquing...and I bought it at a garage sale - never used, in the original box, about 7 years ago...for...are you ready?...for $3.00!!!

Here's looking at the counter wall from the other end of the bathroom, looking toward the door.
A rose clock that was purchased at a garage sale for $1.00 and had never been used. On the wall, by the door [over there on the left in the photo] are my Syrocco Flower Plaques, painted and Rub 'n Buff-ed by me.

They looked like this when I purchased them for only $8.00 for the pair.

After I spray painted them black and added the Rub 'n Buff, they looked like this...
Because of the skylight in the bathroom and the sun shining in it, the flowers don't look as burgundy and the leaves don't look as green as they really are.


When entering the Bathroom, the wall at the opposite end of the door has this arrangement on it.
Another plaque [this time plaster], painted and Rub 'n Buff-ed the same as the syrocco plaques, 2 sconces [painted too] and the beautifully framed in black Parisian Rose Print.

Looking out the door of the Bathroom into the Bedroom.

The prettiest Burgundy/Pink/Green/Ivory rugs, with rubber backing I've ever seen now belong to me and are used throughout the house.
My Pink Bathrobe hangs from a pretty hook on the door.

My walk-in closet...which measures approximately 13' by 6'...is so large, I am able to store lots of things, along with my clothes in here.
When entering the closet, on the left is the light switch and 6 4-foot shelves that are empty...empty because I rearranged the closet the other day.

The fleece DIVA blanket is covering pillows and some other artwork, suitcases and pads for my patio swing, of course, on shelves, too.

I have quite a few of these windows boxes that I put things in for storage...doilies, curtains, clothing, Christmas Ornaments [hand-painted by Celeste], towels, etc.
Aclothes hamper...hanging rod for clothes and the Quilt on the Pedastal is covering the Pups Den [their crate]. They love it there. When it thunders and rains...that's where they head. They did that even before I put their crate in there...because it's an inside room...against the heaviest wall of my home...where we go when there are any Weather Warnings. They sleep so well in there. It's their little CAVE!

Lampshades, finials, more boxes...shoes on the lower shelves.
Sweaters hung on hangers in a special "fold" so they don't pucker at the shoulders and don't fall off the hangers. See the instructions Here.

Around the corner...lamps...winter pajamas, nightgowns, jeans, sweatshirts...

More window storage boxes with sheets, a suitcase, plaques, painting clothes, cooler and tool box.

I hope you enjoyed seeing the re-do of my Master Bedroom and Bathroom. There will be other BEFORE and AFTER pictures/posts to come of other areas of my home.
The color on the walls is Pixie Dust by Valspar. It's a very pale pink.
The pink 60-watt lightbulbs that give a beautiful glow in any room...are from Lighting Supply Company...click Here
The hand-painted items I said were painted by Celeste are some of the many items I've purchased from Celeste at her Celestina Marie Design Etsy Shop
My bedroom set is from ArtVan Furniture and is part of the Rochelle Collection Here
Quilt is from Bella Home Fashions...Here
Window Storage Boxes were found at Lowes
Curtains and Valances are from JCPenney Here mine are Topaz
Rugs are from JCPenney Here mine are Garnet
Thursday, July 21, 2016
Chocolate Caramel Rice Krispie Squares

CHOCOLATE CARAMEL RICE KRISPIE SQUARES
Serves: 16 squares
INGREDIENTS
INGREDIENTS
1½ tbsp. butter
½ bag marshmallows (about 20 large-2 cups mini)
1 tsp vanilla
4 cups Rice Krispies cereal
7 ounces unwrapped caramels (1/2 bag)
1 tbsp. water
¾ cup peanut butter (divided use)
8 ounces milk chocolate
INSTRUCTIONS
Butter a 9 x 9 inch pan. In large bowl melt butter in microwave just until melted. Add marshmallows, stir to coat marshmallows in butter, then microwave until melted, stirring occasionally. This should only take a couple of minutes. Stir in vanilla. Stir in Rice Krispies.
Pour into buttered pan and press mixture firmly with buttered hands. Place in refrigerator to chill.
In saucepan, melt caramels and water on low heat, stirring frequently. (careful not to burn). Remove from heat, stir in ½ cup peanut butter. Blend completely. Pour over Rice Krispies, and spread to an even layer. Put back into refrigerator.
In saucepan over low heat, melt chocolate. When melted, stir in ¼ cup peanut butter. Combine well.
Pour chocolate over caramel layer spreading to edges in even layer. Refrigerate for 1 hour or until chocolate is firm. Cut into squares.
NOTES
Bars are best eaten at room temperature or only slightly chilled. If caramel is too hard let warm to room temperature before serving.
Tuesday, July 19, 2016
Sloppy Joe Pizza

Ingredients for Crust
2 Tbsp sugar
2 Tbsp oil
2 tsp salt
2 cups hot tap water
4 1/2 - 5 cups Flour
2 Tbsp instant (quick rise) yeast
Ingredients for topping
1 lb lean ground beef
1 Onion chopped
1 Red Pepper chopped
1 large bottle of Masterpiece Original Barbecue Sauce
3 Tbsp tomato paste
4 cups cheese (mix of favorites or mozzarella)
1 tsp dried oregano
sprinkle of crushed chilies (for those who like a bit of heat)
Instructions
Method for Crust:
Put sugar, oil and salt in mixing bowl. Add hot water and stir in two cups flour.
Stir in the yeast and add 1/2 cup of flour at a time stirring until all the flour is mixed in well.
Knead for a few minutes until smooth.
Cover with towel and plastic bag and let rise for 20 - 30 minutes. With greased or floured hands, scoop around the edge of the risen dough to deflate.
Spread out on a greased 18 X 13 inch cookie sheet pan. Allow dough to rise for 30 minutes
Bake at 400 F for about 10-12 minutes...until slightly browned..
Method for Pizza
While dough is rising . . .brown the meat and onion. Add chopped red pepper and simmer about 2 minutes. Add seasoning, tomato paste and 1/2 cup water. Simmer another 5-10 minutes. Spread on baked pizza crust (hot or cold) Sprinkle with the cheese. Sprinkle on the oregano.
Bake about 10-15 minutes or until cheese is melted. Large cookie sheet serves 6-8
Thursday, June 16, 2016
Sooo Easy and Sooo Good

Strawberries & Cream No-Bake Pie Filling and Topping
1/3 cup water
1 ½ teaspoons unflavored gelatin
4 oz (half of 8-oz package) cream cheese, softened
3 containers (6 oz each) Greek Fat Free strawberry yogurt
2 cups frozen (thawed) lite whipped topping
1 ½ cups large chopped fresh strawberries
½ cup sliced fresh strawberries
Crust
1 graham cracker crumb crust (6 oz)
Directions
Sprinkle gelatin over the water; let stand 10 minutes. Microwave 15 seconds.
In medium bowl, beat cream cheese with electric mixer on medium speed until smooth. Add yogurt and gelatin mixture; beat on low speed until well blended. Fold in whipped topping. Gently fold 1 ½ cups strawberries into the mixture and spoon into crust. Refrigerate until set, about 2 hours. Before serving, garnish pie with additional whipped topping and remaining ½ cup sliced strawberries.
*note photo doesn’t show strawberries in pie – that was my idea. Can be made in a 9” spring form pan.
Try it, you and your family and guests will love it!
I'm linking up to TOHOT with the following blogs:
I'm linking up to TOHOT with the following blogs:
Thursday, May 12, 2016
Phew...

I've been one busy lady here. Since I work alone on my Courtyard Garden Wall, I don't have anyone to take a picture of me working. And to take a "selfie" - well, you'd never be able to see more than my face and my BIG hat! So, a wheelbarrow filled with dirt and a shovel will be it today. When it's not too cold or too rainy, I have been outside [and that hasn't been much]. But I have gotten some things done. The "Puppy Pen" I built
in the Garage, is not there any longer. After 2 weeks of trying to get the Pups to "go" out there...they absolutely REFUSE to. They stand there and look at me...wondering "why does mommy want us to "go" out here? We always go in the Puppy Pen outside." So, I dismantled it and moved 70 blocks and caps to the drive-way...put out my FREE sign and within the hour...they were all gone! Yippee!!Then I thought I would use the wheelbarrow to move dirt to the Wall Garden in the front. That didn't go too well. My knee [which has had 7 surgeries] hurt almost immediately...and then my back and shoulders got too sore to do anything else. Just 2 wheelbarrows full of dirt made it there. I had to quit.
I ended up having 3 back to back rainy days to try to recover. While I did, I tried out different shoes to find some that were more sturdy than others...and I ended up with a tie-on pair of sneakers. I also practiced the motion of digging the dirt up from the fallen wall...turning and throwing it into the wheelbarrow, filling it up...rolling it to the wall and taking the dirt, turning and throwing it into the wall. It was both the action of digging the dirt from against the wall and turning that created the problems. I've dislocated both shoulders a few times over the years so shoveling into a firm wall of dirt didn't feel too good. But I found a way around that.
So the next time I tackled the dirt, I went on the other side of the wall and used to shovel to loosen the dirt from the wall. It worked! Looser dirt, less pressure to shoulders. I also found a good way to stand that kept my right knee more stable...preventing it from turning too much with every shovelful. Remembering that I had only been able to do 2 wheelbarrowsful of dirt the last time...I figured I would set a goal of doing 5...then stopping for the day.
When I was finished with the 5th wheelbarrowful of dirt...I felt fine and continued. I wound up doing 15 that day! No pictures to show...because it doesn't look like much was done. But, believe me, having that front section filled with dirt...is BIG to me!!
Then more rain came...and stayed. So, I've been busy inside the house.
Saturday, May 7, 2016
What a Surprise!!

My son, Stephen, surprised me with a box of these incredible, mouthwatering creations for Mother's Day! What a wonderful surprise!!! Thanks! Love you!
Each strawberry was dipped and covered with nuts, chocolate chips or additional drizzle. The end result is a heavenly combination of flavors.
Each strawberry was dipped and covered with nuts, chocolate chips or additional drizzle. The end result is a heavenly combination of flavors.
4 Strawberries Dipped in Milk with Chopped Almonds
4 Strawberries Dipped in Dark with Chocolate Chips
4 Strawberries Dipped in White with Dark Swizzles
Thursday, May 5, 2016
Live One Day at a Time by Joyce Meyer

So do not worry or be anxious about tomorrow, for tomorrow will have worries and anxieties of its own. Sufficient for each day is its own trouble. —Matthew 6:34
Most of us have enough to handle today without worrying about tomorrow. God will give you grace for today, but He will not give you grace for tomorrow until tomorrow arrives.
So often people worry about something that never happens. When you begin to think about the “what ifs,” the door opens for fear and worry. Some people worry so much that their worries become fear, and often the things people fear manifest in their life.
Do not allow yourself to dread tomorrow. Just know that God is faithful. It is comforting to know that whatever tomorrow may hold, He holds tomorrow. His grace is sufficient to meet the need. Do not waste today’s grace by worrying about tomorrow. Live one day at a time and you’ll be amazed at how much you can accomplish for Christ.
From the book Ending Your Day Right by Joyce Meyer. Copyright © 2004 by Joyce Meyer. Published by FaithWords. All rights reserved.
Subscribe to:
Posts (Atom)